Description: Demonstrates how to create a custom status for any resource accounts.
1. Log in to
Oracle Identity Manager Design Console.
2. Navigate to
Resource Management ->
Resource Objects. Search for a resource object and then add a new entry to the
Status Definition section.
 |
| Added Locked Status |
3. Navigate to
Process Management ->
Process Definition. Search for the process definition that is using the resource object you added a status to. Select a process task and map the new status in the
Task to Object Status Mapping section.
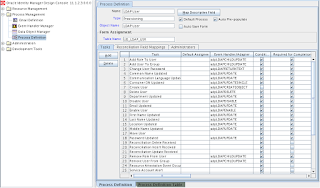 |
| Process Definition |
 |
| Mapped New Status on Completion of Process Task |
4. Navigate to
Administration ->
Lookup Definition. Add new status to
Lookup.WebClient.Resources.ResourceStatus lookup definition.
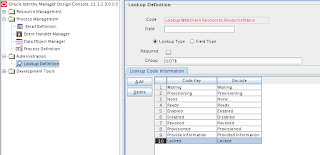 |
| Locked Status to Render in UI |
5. Verify new status by executing the process task on a resource account. To do so, go to the resource account's
Resource History and add your process task.
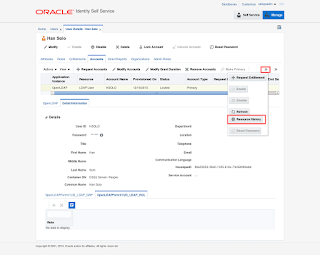 |
| Resource Account Resource History |
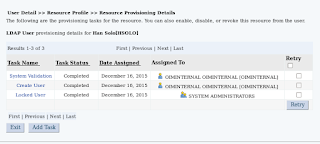 |
| Add Task |
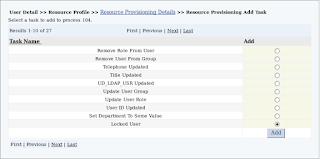 |
| Select Process Task to Execute |


No comments:
Post a Comment